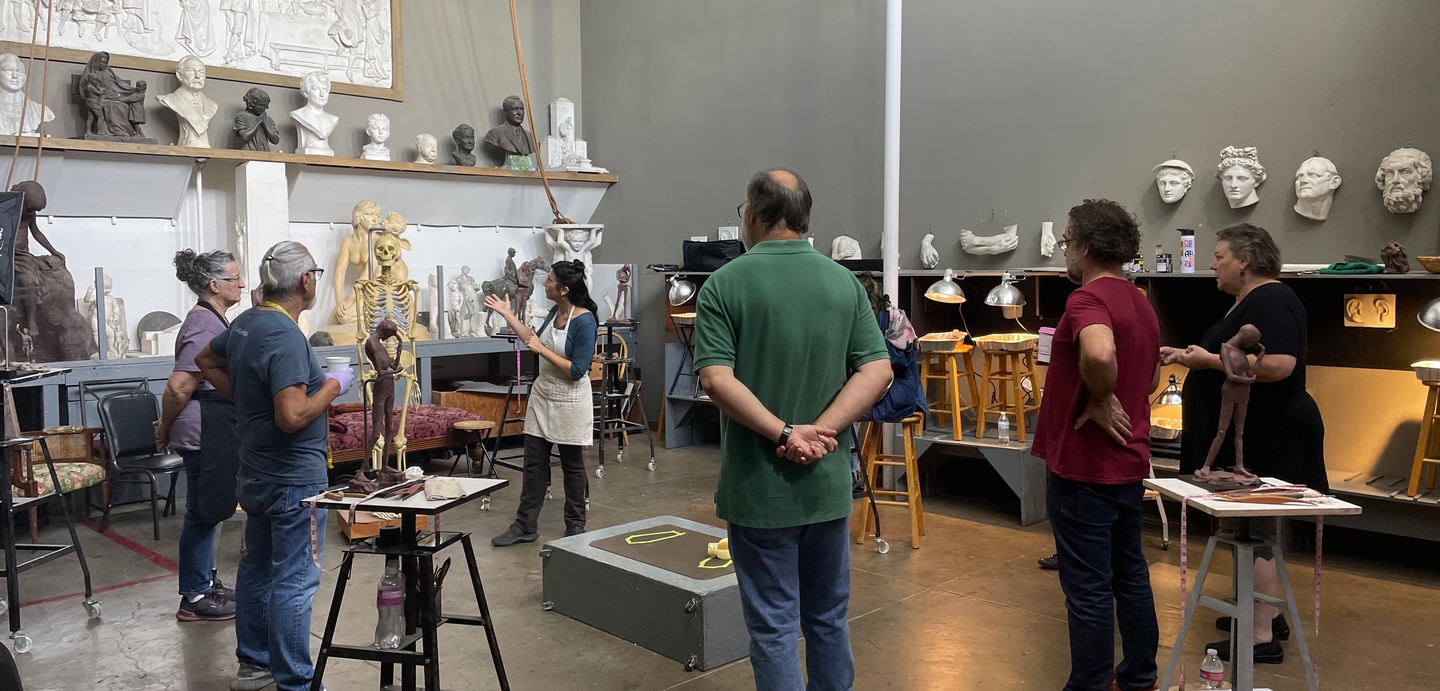
Coppini workshops are multi-day intensives led by visiting master artists. They are designed for focused growth in a short time and welcome artists at a range of experience levels.

Location: Studio
2/20/26 - 2/22/26
Members: $535.00
Non-Members: $585.00
Date: February 20–22, 2026
Instructor: Michael Mentler
Location: The Coppini Academy of Fine Arts
Address: 115 Melrose Place, San Antonio, TX 78212
Time: 9:00 AM – 4:00 PM daily
Cost: $535 (Members) | $585 (Non-Members)
If you’ve ever wanted to attend one of Michael Mentler’s renowned classes, this is your opportunity. Join this immersive three-day Mentler Méthode Master Lab at The Coppini Academy of Fine Arts and experience the timeless drawing methods of the Renaissance Masters.
The Mentler Méthode Master Lab focuses on the essential drawing skills mastered by apprentices in the Renaissance Bottegas—charcoal, sanguine and black chalk, and pen and ink. Michael Mentler will present and demonstrate these mediums, exploring the techniques and materials used by the great Masters.
From Leonardo’s red chalk studies for The Last Supper to Michelangelo’s powerful Sanguine drawings for the Sistine Chapel, participants will rediscover the expressive beauty of this Blood Red Iron Oxide medium that inspired generations of artists.
Expect a tour-de-force visual presentation exploring the work of Leonardo, Dürer, Michelangelo, and others—revealing how these titans understood form, function, and proportion.
Attendees will learn the most efficient Méthode for drawing the human form—the same principles used by apprentices in the workshops of the Italian Renaissance.
By combining theory with hands-on practice, artists will refine their craft in the spirit of Leonardo and Michelangelo.
All drawing materials will be provided for in-studio use. Please bring a notebook and writing instrument to take notes during demonstrations.
Participants receive special discounts on Michael Mentler’s DVDs, Blu-rays, books, and original drawings, including his acclaimed Book of Bones.
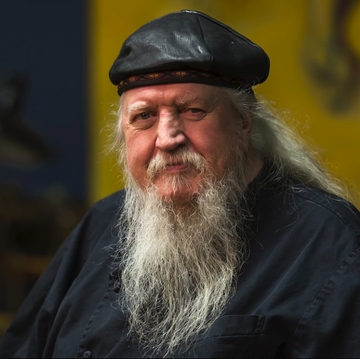 Michael Mentler is a master painter, sculptor, draughtsman, designer, photographer, and author. His creative journey has earned him over a hundred awards, including numerous Best of Show and Gold Medals from top juried exhibitions. His work resides in private and institutional collections such as the Pulitzer, the Mead Library, and the Dallas Museum of Art.
He is the Founder and Director of The Society of Figurative Arts (TSOFA), where he mentors select apprentices. Mentler’s work and philosophy have been featured in American Artist, Drawing, Graphis, and Communication Arts, among many others. His book The Book of Bones is widely used in art schools around the world.
“Michael’s sketchbooks are masterpieces—he is a modern-day Leonardo.”
— Richard Schmid“Michael wields a pen like a Renaissance Virtuoso.”
— Sherrie McGraw
Phone: (210) 530-8445
Email: outreach@thecoppini.org
Website: www.thecoppini.org

Location: Studio
2/27/26 - 3/1/26
Members: $650.00
Non-Members: $700.00
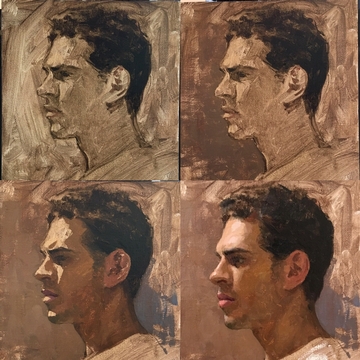
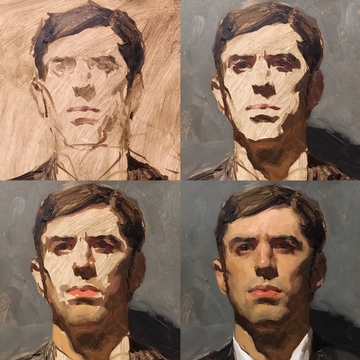
In this workshop, we will focus on creating a portrait from life using a wet-into-wet direct painting technique. The class will start with a demonstration by Sean. During this time he will go over set up, materials, organizing the palette, drawing, coloring mixing and paint application. After the demonstration students will take their turn at painting the same subject while Sean walks around the room helping each person individually. On day two and three Sean will paint along with the class to lead them through the color mixes while still spending time with each student to help refine their pieces. We will be painting a new model each day.
2024-Supply List
(All supplies only RECOMMENDED. NOT required. These are the supplies Sean will be using for the workshop.)
Oil Colors:
- Cadmium Green
- Scarlet Lake or Cadmium red light
- Transparent Red Oxide
- Yellow Ochre
- Indian Yellow
- Titanium White
- Manganese Blue Hue
- Cobalt Blue
- Dioxazine Purple
- Permanent Alizarin Crimson
- Olive Green (Winsor Newton or M. Graham NOT Gamblin)
-French Ultramarine Blue
Brushes:
-Trekell Golden Taklon rounds(short handle) and filberts 4 to 12(similar to Winsor Newton University series short handled rounds)
Ampersand gessobord- 9x12”, or larger
Paper towels
Palette (wood, glass, or disposable)
Notes*
Any brushes you have or have a preference for are fine. If you use a canvas or canvas board then you may consider using bristle brushes. I use bristles when I paint on canvas boards. I prefer the filbert shape in sizes 4 to 12-long handles.

Location: Studio
3/13/26 - 3/15/26
Members: $400.00
Non-Members: $450.00


This three-day workshop will be all about how to paint the younger model. As a mother of two and a seasoned commissioned portrait artist, Anna has learned how to capture the spirit of youth that is often so difficult to master in portrait painting. She will discuss how to draw a child so they look their age, how to mix skin tones and paint hair, and she will also share some strategies for painting children from life. Each morning Anna will demonstrate from photo references by painting children of different ages (a baby, a toddler, an older child, etc.). Students will work from their own photos in the afternoon under Anna’s instruction and have the option of doing four separate paintings (one for each day) or working on the same one for the duration of the workshop. The workshop will be conducted in oils, but pastelists and acrylic painters are also welcome. www.artworkbyannarose.com
Supply List for Painting Children Workshop (2026)
Instructor: Anna Rose Bain
Before the workshop, please email Anna (annarosebain@gmail.com) 5-7 possible reference photos you would like to work from. Anna will conduct a slideshow on the first day of the workshop, going through everyone’s submissions and discussing which ones will work best and why. We will also discuss how to make edits (cropping, adding/removing, etc.) to our reference photos in order to make the best work possible. Anna will be doing a different painting demo each day and encourages each student to do this as well; however, students have the option to continue working on one painting if they would like more time on it.
Painting supplies:
v Middle value palette (can be wood, Grey Matters wax paper, or glass over grey)
v Paper towels (I like Viva)
v Palette knife (3” straight blade)
v Odorless mineral spirits (Gamsol) and jar for cleaning brushes
v Oil-primed linen canvases, lead-primed panels, or linen-covered oil primed panels in sizes 9x12 up to 16x20 (artist’s choice). You will need 1 canvas for each day of the workshop. If possible, PLEASE use linen canvases instead of cotton. My favorite linen panels are double-primed Belgian linen panels from Raymar Art (www.raymarart.com). Centurian also makes a more affordable version. As far as stretched canvases, I often make them myself, but the next best thing is Claessens double-primed #13 linen which you buy by the yard and then staple to stretcher bars or simply tape to a board. Lead-primed panels can be found online by Artefex (#533 is my favorite).
v Trash bag you can attach to your easel, for used paper towels
v Disposable gloves (optional)
Paints (standard 37ml tubes – I’ve put in BOLD the colors that are staples on my palette, and in parentheses the brands that I recommend for each color. If you have something similar to the following, bring what you have!
v Titanium white (Michael Harding) – 150 ml tube
v Warm white (Utrecht)
v Warm light yellow (Michael Harding)
v Warm grey (Utrecht, optional)
v Transparent oxide brown (Rembrandt)
v Transparent oxide red (Rembrandt) I HIGHLY recommend getting these two colors from Rembrandt! As opposed to using raw umber or burnt umber. Please try them out if you can.
v Ultramarine blue (Rembrandt)
v Viridian (Rembrandt or Winsor & Newton)
v Yellow ochre pale (Winsor & Newton or Sennelier)
v Cadmium lemon (Sennelier)
v Cadmium yellow pale (Sennelier)
v Cadmium orange (Michael Harding or Sennelier)
v Cadmium scarlet (Winsor & Newton) or Cad Red Light (Sennelier)
v Permanent Rose (Winsor & Newton)
v Amethyst (Michael Harding, optional)
v Radiant green (Gamblin) and Radiant turquoise (Gamblin), both optional
v Ivory black (Gamblin)
Brushes*
v Rosemary Long Flat brushes, series 279, in sizes 4-8
v Rosemary Short Flat brushes, series 77, sizes 6-10
v Rosemary Round brushes, series 272, size 5-8
v Rosemary & Co Eclipse pointed round size 1 (for detail)
v Isabey Isacryl Series 6582 Synthetic Flat Size 4
v Richeson Grey Matters Series 9811 Synthetic Round Size 4
v Flat bristle brushes in all sizes from 6-12. I use sizes 7 and 8 the most. (Robert Simmons Signet, or Silver Unlimited, or Rosemary Evergreens)
*Bring what you have and we’ll make them work! This is just a listing of my personal favorites but my favorites are always changing and fluctuating. Lately I’ve been using a lot more synthetic filberts, such as those in the Princeton Aspen series. Silver Unlimited also makes great brushes.

Location: Studio
3/26/26 - 3/28/26
Members: $650.00
Non-Members: $700.00
March 26–28, 2026 | 9:30 AM – 4:30 PM Daily
Coppini Academy of Fine Art | 115 Melrose Place, San Antonio, TX 78212
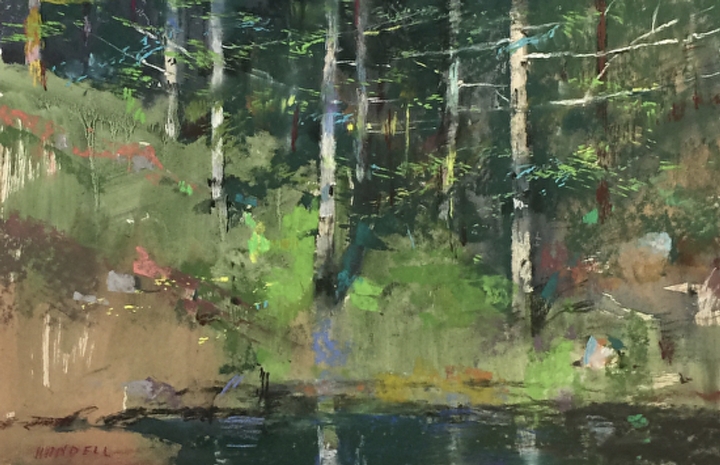
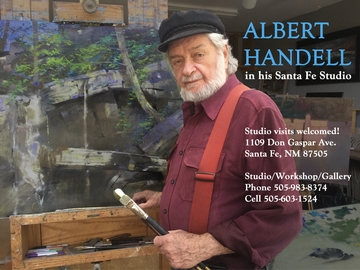
Join us for an extraordinary three-day workshop with acclaimed fine arts talent Albert Handell, hosted by the Coppini Academy of Fine Art—a truly unique Fine Art Academy in San Antonio.
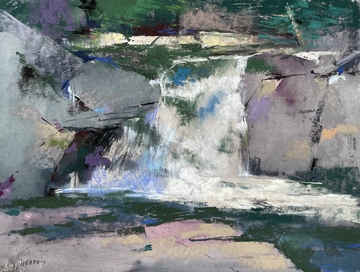
Each day features morning demonstrations in pastel and afternoon demonstrations in oil, with participants free to work in the medium and subject of their choice.
This is a rare opportunity to study directly with a master artist known for his exceptional handling of light, texture, and atmosphere.
Workshop Details
Dates: Thursday–Saturday, March 26–28, 2026
Time: 9:30 AM – 4:30 PM daily
Location: Coppini Academy of Fine Art, 115 Melrose Place, San Antonio, TX 78212
Tuition: $650 (CAFA Members) | $700 (Non-Members)
Enrollment: Limited spaces available
To Register
Enroll and pay via PayPal or credit card at www.thecoppini.org/curriculum .
For questions or accommodations, contact:
Tom Ellis – (210) 508-0813 | tomellis1@me.com
If you would like additional individual guidance, you may bring 4–6 dry, unframed oils or pastels for critique and instruction.
Supply List:
Please bring your travel easel and the oils or pastels you normally work with.
For additional workshop information, contact the Handell Studio at (505) 603-1524 or alberthandell@msn.com.

Location: Studio
4/25/26 - 4/27/26
Members: $500.00
Non-Members: $550.00
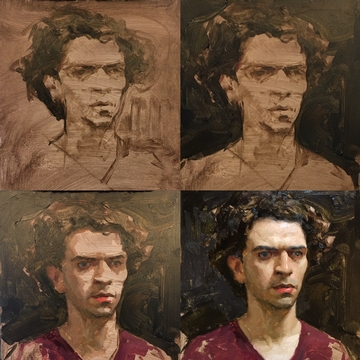
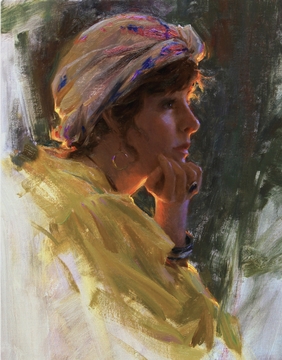
Join acclaimed painter Mary Qian for a three-day intensive workshop exploring the three essential tools of portraiture: value, color, and edge.
Day 1 (Friday, April 25): Begin with a dramatic lighting setup and a limited palette. Mary will demonstrate how to see and construct the head through facets, showing how light reveals form and how values define the quality of lighting. Students will paint in the afternoon.
Day 2 (Saturday, April 26): Dive into the world of color. Through demo and discussion, Mary will explain color mixing versus application, and how to think in terms of color composition and relationships rather than formulas. A second demo will show how subtle color temperature shifts can model form under flatter light.
Day 3 (Sunday, April 27): Discover the expressive power of edges. Mary will demonstrate a variety of techniques to control edge quality, showing how it transforms both form and atmosphere. Students will paint and receive individual instruction and critiques throughout the day.
Whether you are looking to refine your portrait practice or gain new insights into figurative painting, this workshop will give you the foundation to create naturalistic, expressive human portraits with confidence.
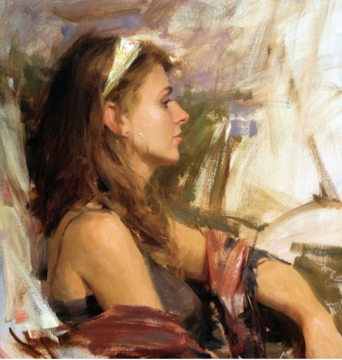
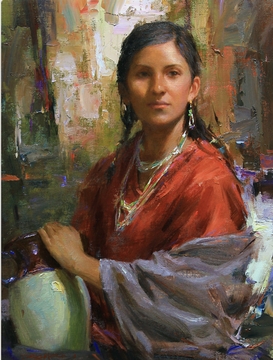
My paintings are my preferred way to explain myself to the world. They speak of the things I don'tknow how to put into words.
Painting is a process and it connects me, my sitters and the viewers.? It is a bridge between past and present. I want to paint people, because people intrigue me, especially during the process of communication in silence.
I hope viewers will feel what I felt in the moments of painting. See what inspired me!
Graduated From Brigham Young University Bachelor of Fine Arts
AWARDS
Featured in:
Location: Studio
5/15/26 - 5/17/26
Members: $550.00
Non-Members: $600.00
Born in the Philippines in a community of artists, Romel de la Torre's artistic interest started at a very young age. With the encouragement of his parents he began sketching the world around him.
WORKSHOP DESCRIPTION
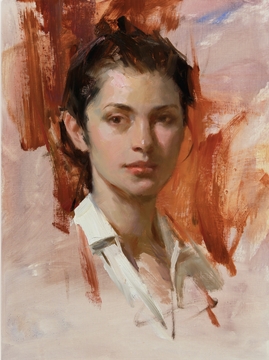
This 3 day workshop will focus on painting the portrait from life. Discover the art of capturing not just a likeness, but the unique spirit of your subject in this immersive portrait painting workshop. To go beyond just replicating features, learn how to infuse your painting with life, emotion, and character.
Romel will demonstrate every morning on his approach to painting the portrait, using his direct fluid painting style with heavy emphasis on the use of improving color, drawing skills, value relationships, understanding edges and capturing the "feeling" of light.
Learn to use the elements that make a painting stronger, exciting and to build a strong foundation: creative use of color & edges, visual movement, paint application/ brushwork, distribution of abstract shapes and strong design. Students will also learn how to combine working from life and photographs to a finish piece.
Since the workshop students are at different levels the instruction will be individualized for each students' specific needs. This comprehensive class is designed for all artists - from enthusiastic painter eager to tackle the human face to experienced painters looking to refine their techniques and add depth to their portraits.
All levels are welcome but participants must have prior drawing and painting experience.
For more information about Romel and his work, please visit his Instagram page at: romeldelatorre or www.romeldelatorre.com
SUPPLY LIST
Oil Paints:
1. Cad. Yellow Lemon or Light (Rembrandt, Winsor & Newton or Utrecht)
2. Cad. Yellow Deep (Rembrandt or Utrecth)
3. Yellow Ochre (Rembrandt or Utrecth)
4. Cadmium Red (Winsor & Newton)
5. Terra Rosa (Holbein or M. Graham )
6. Quanacridone Red or Red Rose (Utrecth or Rembrandt)
7. Burnt Sienna or Transparent Oxide Red (Winsor & Newton or Utrecth)
8. Permanent Alizarin Crimson (Utrecth or Gamblin)
9. Viridian Green (Rembrandt or Utrecth)
10. Ultramarine Blue Deep (Rembrandt or Utrecth)
11. Cobalt Blue (Rembrandt or Utrecth)
12. Ivory Black (M. Graham or Williamsburg)
13. Titanium White (Williamsburg, Utrecht or Rembrandt) Large tubes
(You don't necessarily have to have these brands but I'm listing here the paint brand/s that I use.)
Brushes:
Bristles (Robert Simmons)
#4, 6 (filberts)
#10, 12 (flats)
Trekell 400MKF #1, #2 (long filberts)
Website: www.trekell.com/Hog-Bristle-Long-Filbert-400MKF-Series_p_1090.html
Rosemary & Co (Masters Choice long flat - Series 279) - #1, 2, 6
Website: http://www.rosemaryandco.com/
(Please no Nylon brushes except Bristle)
Location: Studio
10/9/26 - 10/11/26
Members: $450.00
Non-Members: $500.00

October 9–11, 2026
The Coppini Academy of Fine Arts • San Antonio, TX
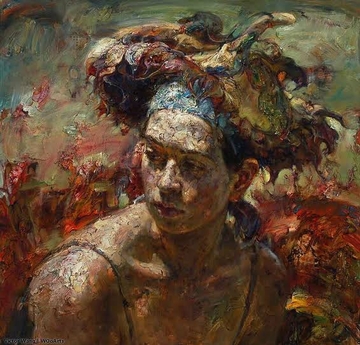
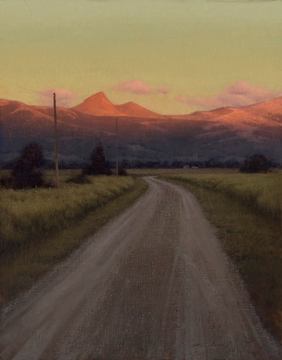
Discover the power of impasto and transform your portrait painting in this three-day, hands-on workshop with internationally acclaimed artist Victor Wang.
Join us for an immersive experience focused on building expressive, textured portraits using thick, sculptural paint. Victor will guide students through his signature approach to impasto—layering, palette-knife application, color harmony, and the dynamic relationship between texture, emotion, and form.
Whether you’re an emerging painter or a seasoned artist looking to deepen your technique, this workshop will elevate the way you see and create.
Victor Wang grew up in northern China and earned his BFA from the Lu Xun Academy of Fine Arts, one of China’s top three art institutes. After graduation, he taught there for four and a half years before coming to the United States as a visiting scholar at the University of Illinois at Urbana–Champaign.
He later earned his MFA from Fontbonne University, where he is now a full professor teaching painting, drawing, and graduate critique.
Victor’s work has been exhibited extensively across the United States and internationally, earning numerous awards for excellence—both for his extraordinary painting and his outstanding instruction. Students travel from around the world to study with him, and this is a rare opportunity to learn from him in an intimate, focused setting.
Please note: Workshop fees are non-refundable for cancellations made within 60 days of the workshop start date, unless we are able to fill your reserved space.
Location: Studio
10/23/26 - 10/25/26
Members: $450.00
Non-Members: $500.00
October 23–25, 2026
The Coppini Academy of Fine Arts • San Antonio, TX
10:00 am – 5:00 pm • 3 Days • Intermediate–Advanced
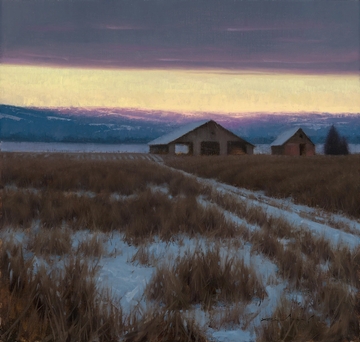
This three-day oil painting workshop with Richie Carter focuses on painting low light tonal landscapes that are rich in atmosphere and mood.
Working from photo references, students will complete at least one small preliminary study and then develop a larger, more resolved version of the same scene. Richie will demonstrate how to use photographs as a tool—not a crutch—showing you how to make artistic decisions that improve composition, light, and drama.
Over the course of the workshop, you’ll explore a subdued tonal palette and learn both direct and indirect painting methods. Layer by layer, you’ll build depth, luminosity, and unity into your final landscape.
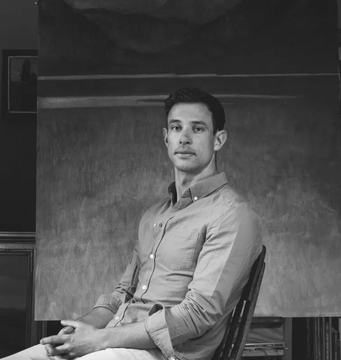 Richie Carter is a contemporary oil painter known for his evocative landscapes and sensitive handling of tone and atmosphere. His work often explores the quiet transitions of light at dawn, dusk, and in overcast conditions, inviting viewers into contemplative, emotionally rich spaces.
Richie exhibits nationally and shares his craft through workshops and teaching. His instruction blends strong fundamentals with a refined eye for mood and subtle value shifts, making him an ideal guide for artists looking to deepen their landscape practice.
To see more of Richie’s work, visit www.richiecarterfinearts.com .
Please note: Workshop fees are non-refundable for cancellations made within 60 days of the workshop start date, unless we are able to fill your reserved space.
Location: Studio
11/22/25 - 11/23/25
The Coppini Academy of Fine Arts is participating in seven (7) benefit workshops for flood relief for the Hill Country Arts Foundation impacted by the 2025 July 4th flood.
100% proceeds from workshops will be donated to HCAF. Varying workshop locations, dates & times: visit hindes.com for details.
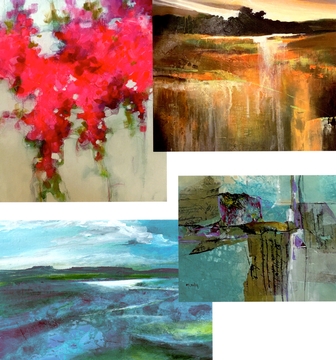
We will use mixed media collage, using acrylics.
It will be two (2) fun days of choosing and making materials to use in your layering process. You will then begin adding and subtracting, using paint color and collage.
You'll develop your skills using design principles. These will help you complete a finished work of art. Fun for any level!
Supply List:
Biography
Karen McCauley, is an accomplished Artist and Teacher with over 30 years of experience. A master of traditional oil painting, she has expanded her expertise to include acrylics and mixed media bringing depth and versatility to her work. She has studied with some of the finest instructors in the country refining he r craft. Her formal studies include drawing painting, design, and print making. Passionate about sharing her knowledge, Karen began teaching weekly classes at the Coppini Academy of Fine Art in San Antonio. There, she inspires and mentors the next generation of fine artist.
Contact: Karen McCauley
830 570 0131
kmcart3006@yahoo.com

Location: Studio
10/4/25 - 10/5/25
Ronald Watkins
Still Life Painting Workshop
9:00 AM – 4:00 PM
October 4th and 5th
For over 40 years, Ron has been painting and teaching. During this workshop, we will set up a variety of still-life arrangements to paint. We will explore color, the form of objects, and how to stage our still lifes to create beautiful paintings.
You are encouraged to bring objects you would like to paint, such as fruit, flowers, or other items. The studio also has still-life objects and fabrics available for use.
Paper towels (Viva brand)
Odorless paint thinner
Canvas or canvas boards (8x10 or 16x20)
Brushes (any kind)
Paints
Titanium White
Cadmium Lemon Yellow
Cadmium Yellow or Cadmium Yellow Medium
Alizarin Crimson
Phthalo Red Rose
Cadmium Red Light
Ultramarine Blue
Phthalo Blue or Cerulean Blue
Burnt Sienna
Yellow Ochre
Ivory Black
Pastels
Bring as many colorful pastels as possible, along with any type of paper you prefer to work on (sizes 8x10 to 16x20).
For questions, call or text Ron at (210) 325-5250 or email rwatk6753@aol.com .
This is going to be a great workshop! All questions will be answered, and Ron will ensure you go home with a wealth of knowledge and inspiration.
3/27/25 - 3/29/25
Coppini Academy of Fine Art
115 Melrose Place
San Antonio, Texas 78212
TX
United States
Sandra Esparza
sandralespara@gmail.com
956-236-4305
For more workshop Information...please read on…..
MORNING DEMONSTRATIONS ARE IN PASTEL
(9:30am-noonish) In the afternoon (1-5:00pm) artists paint with the medium of their choice with Alberts help at the easel, suggested sizes to work on no smaller than 10×14, no larger that 18×24. Bring at least 4 PASTEL PAPERS to work on.
SUGGESTED ART SUPPLIES
Bring what you already have
What Art Supplies Should The Pastel Artist Bring?
If you are painting in pastel, bring all the pastels that you have and the pastel papers that you like to paint on – plus a few lightweight drawing boards i.e., made of foam core or gator board or any lightweight material.
Albert likes to pastel on the mounted U-Art sanded paper, both 500 and 600 grits.
He prefers the sizes no smaller than 9×12” and as large as 16×20 or definitely no larger than 18×24” The U-Art sanded papers and other very fine pastel surfaces can be purchased directly from Dakota
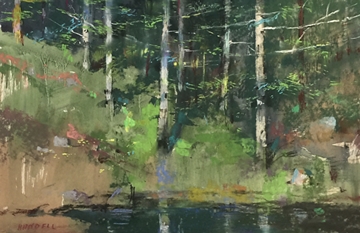
Art Supplies (they only sell pastel supplies) 888.345.0067. ALBERT pastels on mounted 500grit Buff colored sanded pastel papers whjch are mounted by the U-Art, Co.
If you wish to work on other pastel papers, be sure to bring them to the workshop.
What Pastels should I bring?
All pastel brands are good, since plein air painting is a one session experience. Mr. Handell paints with a combination of Unison, Schmenke, Nu-Pastels, Rembrandt, Senelier, to name a few.
Bring what you already have.
Other Pastel Materials:
115 Melrose Place
San Antonio, Texas 78212
Sandra Esparza
sandralesparza@gmail.com
956.236.4305
https://www.instagram.com/zinlimart/
Explore the World of Expressive Portrait Painting!
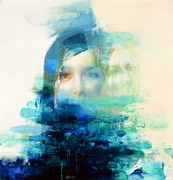 Are you yearning to break free from the confines of tight and controlled portrait painting? Experience the exhilarating world of unpredictable textures and vibrant color blends created by expressive brush strokes in our upcoming portrait painting workshop! Guided by the accomplished instructor, Zin Lim, this immersive workshop is tailored for artists of all levels seeking to master the captivating art of creating loose and expressive portraits with a distinctive personal touch.
Day 1: Portrait in Classic.
Day 2: Portrait in Impressionist.
Day 3: Portrait in Expressionist.
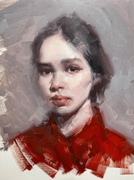 What to Expect:
-In-Depth Exploration: Delve into the foundational elements of head painting, including proportion, gesture, and value systems.
-Creative Process: Uncover the secrets of making intriguing brush marks, selecting a limited yet impactful color palette, and crafting a compelling composition that reflects your artistic voice.
-Hands-On Experience: Engage in a series of activities where you'll create three Alla Prima paintings from carefully chosen photo references. These sessions will utilize expressive application techniques and stage breakdowns to breathe life into your portraits.
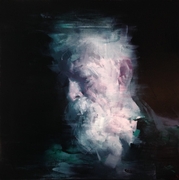
Why Join:
-Expert Guidance: Benefit from Zin Lim's wealth of experience and expertise in guiding artists towards achieving expressive and dynamic portraits.
-Skill Enhancement: Whether you're a seasoned portrait artist looking to expand your skills or a beginner aiming to cultivate a fresh style, this workshop caters to a diverse range of skill levels.
-Unique Learning Opportunity: Don't miss this incredible chance to elevate your portrait painting under the mentorship of Zin Lim. Seize the opportunity to enhance your techniques and bring a new dimension to your artistic repertoire.
Join us on a journey of artistic discovery and elevate your portrait painting skills to new heights. Reserve your spot now and embark on an enriching experience that promises to redefine your approach to portraiture!
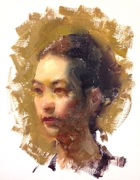 Material list
-Oil Paint: Any brand of Titanium White, Cadmium Yellow, Cadmium Red, Alizarin Crimson, Ultramarine Blue, Pthalo Green (or Viridian), Burnt (or Law) Umber, Ivory Black
-Canvas paper pad or Stretched canvas (12x16 inch or larger, smooth surface is better).
-Brushes: Various sizes of flat (either natural or synthetic hair of any brand is fine but must have good shape of hair). Zin mostly uses low price/synthetic flat brushes.
Palette Knife: Sharp.
-Palette: Palette Pad or any wooden/plastic/glass palette.
-Medium: Pure, Odorless 'Linseed oil’, ‘sunflower oil’, or 'safflower oil' (similar smell and texture to normal home cooking oil) in a jar. No fast-dry medium, such as; Liquin or Galkid. (At the workshop, Zin will use Sunflower oil + odorless mineral spirit).
-Paper towel or rag: To wipe the oil with a brush.
*For our healthy study experience, please don't use fast-drying mediums, or smelly or toxic mediums, such as Liquin, galkid, etc. But use an odorless/no-smelly medium only.
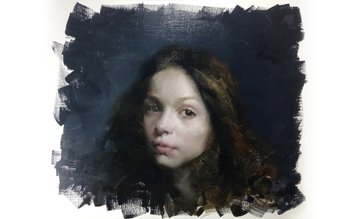 Testimonials
Coppini Academy of Fine Art
115 Melrose Place
San Antonio, Texas 78212
TX
United States
Sandra Esparza
sandralespara@gmail.com
956-236-4305
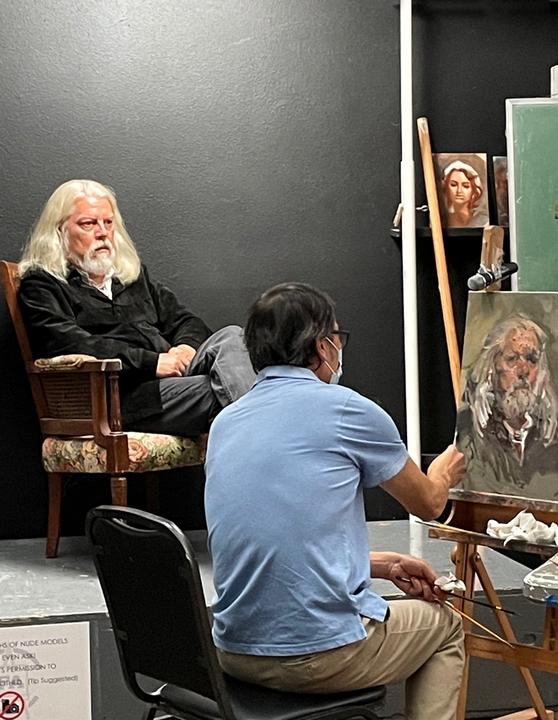
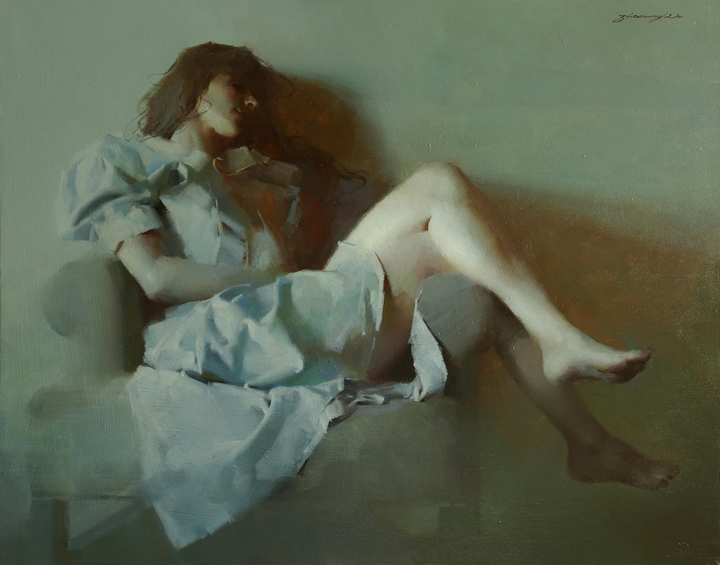
In this 3-day workshop, Zhaoming will teach a traditional “painterly” technique of oil painting. It will be applied to clothed figure painting in an alla prima” approach. Emphasis will be placed on composition, color and understanding light on form. It will include the process of producing appropriate values and edges to create mood and atmosphere. Students will be led into portrait painting practice by observing Zhaoming’s demonstrations along with individual instruction, and critiques.

Zhaoming’s understanding of classical techniques and superb draftsmanship has enabled him to paint in a loose manner, developing his own concept and personal style.
His workshop is special and limited to a few throughout the year.
Demo from live young female model A, in the morning(3 hours).
Student paint from same model A at afternoon (3hours). Zhaoming will give the individual instruction, critique to at afternoon
Demo from live young female model B, in the morning(3 hours).
Student paint from same model B , at afternoon (3hours). Zhaoming will give the individual instruction, critique to at afternoon
Demo from live young female model A, in the morning(3 hours).
Student paint from same model A at afternoon (3hours). Zhaoming will give the individual instruction, critique to the student in afternoon.
Influenced by the 19th century French painters, Zhaoming Wu describes his ork as representational, but not traditional classical. This technique can be seen through the combination of more modern elements. Utilizing his knowledge of heightened colors and values, he makes powerful, conscious decisions about their application. Active for many years as both an artist and a teacher, Zhaoming has works exhibited in museums and private collections around the world.
The national and international publications have highlighted his vibrant career and technique. He has been featured in major domestic art magazines such as Fine Art Today, Fine Art Connoisseur, American Art Collector, Southwest Art, Art of West and Plein Air Magazine. International publications include Arte Y Libertad (Spain), Art Panorama (China) and Pratique des Arts, (French). He has published 11 books and was featured in 3 instructional DVDs.
Major awards and honors have been given to Zhaoming Wu. These organizations include the International Artist’s Magazine, Oil Painters of America and the National Oil and Acrylic Painter’s Society, among others. For 9 consecutive years, he was a juror of an international art contest at the Museum of Modern Art in Barcelona, Spain.
Coppini Academy of Fine Art
115 Melrose Place
San Antonio, Texas 78212
TX
United States
Contact Info
Sandra Esparza
sandralesparza@gmail.com
956-236-4305
Description
Jenny Buckner Workshop
Workshop description
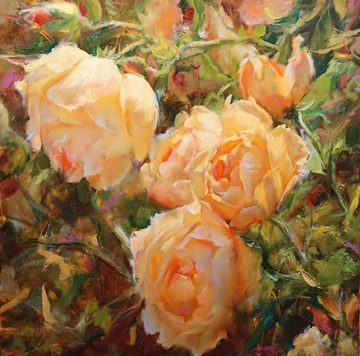
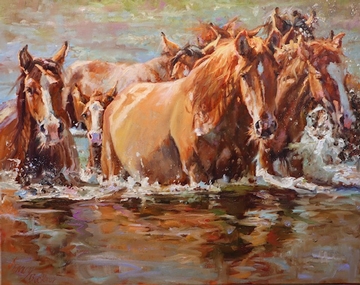
-We will be working 9-4 (one hour lunch). I will be showing my entire process from sketch to finish. We will discuss photographing animals and florals, painting light and shadow, values, color, chroma. I have several different exercises to help your painting journey. You will finish 2-3 paintings. I will be demonstrating. It's a special and fun time. All the workshops follow this guideline.
Workshop Supply List
Paint- Alizarin Crimson
French Ultra Marine Blue
Cadmium Red Medium
Cadmium yellow medium
Cadmium yellow light
Ochre
Raw Sienna (by Rembrandt)
Burnt Sienna
Burnt Umber
Radiant Turquoise, (these next four are very good too for florals but not essential: radiant blue, radiant violet, radiant red, radiant magenta) by Gamblin
Titanium White
Cadmium Orange
Provence blue by Charvin.
Sap Green
Cerulean Blue
Transparent Orange by Gamblin
Naples Yellow
Quinacridone Rose (or Q. Fushia or Q. Magenta)
Brushes
I use long filberts and flats in all sizes, but I recommend you bring whatever you normally paint with.
Palette knife
Odorless Mineral Spirits
Viva paper towels(smooth kind)
Murphys Oil Soap
Palette
Canvas- bring a variety of sizes.
Tone all canvases with transparent orange.
Easel
Ruler
Pencil or charcoal
3/8/2024 - 3/10/2024
115 Melrose Place
San Antonio, Texas 78212
Sandra Esparza
sandralesparza@gmail.com
956.236.4305
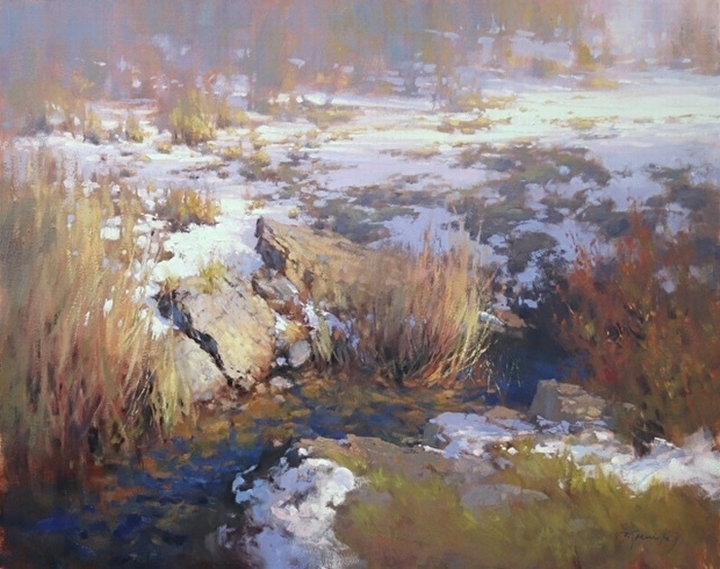
Once you learn the basic mechanics of painting the landscape, it’s time to learn how to add the poetry. We’ll examine the
difference between paintings that merely contain elements of the landscape, and those that convey a distinct visual
message… and how to gain the skills necessary to accomplish this.
Skills covered will include composition, editing, value structure, color temperature and chroma. We’ll also address how to
make every stroke count, considering the particulars of how you apply pigment to surface and how the quality of the
application will contribute to your painting’s message.

Each day of the workshop will begin with a demonstration followed by students working on a specific painting exercise for
the remainder of the day. Instructor demos will include both oil and pastel. Students will receive plenty of individual help
from the instructor at the easel during their painting time.
This workshop is open to all levels, although artists with at least some basic landscape painting experience will benefit
most.
Barbara loved drawing and painting as a child, but it was stubborn determination more so than natural
giftedness that launched her artistic journey in her early teen years. Her grandmother was an
accomplished oil painter, and although she didn’t directly encourage Barbara to follow in her footsteps,
Barbara’s childhood was surrounded by her beautiful paintings.
Not realizing that a career in fine art could be a possibility, she steered her initial career choice toward
another art-related field, receiving a Bachelor of Arts degree in 1986 from The College of New Jersey
(formerly Trenton State College), majoring in Art with an emphasis in Advertising and Design.
Barbara’s early career was spent in advertising as an art director, then later in corporate marketing
communications. Without much time for painting during these earlier careers, she always knew she
would eventually continue her original artistic passion, and in 1999 she gradually but intensely began to
do so. Finally, in 2002, she was able to turn her focus to a fine art career, pursuing it full steam ahead.
Working in oil and pastel, Barbara strives to capture light-filled landscapes in an impressionist style. The
majority of her work is created in the studio, but a regular practice of plein air painting enhances her
ability to capture a genuine sense of light in her paintings.
She holds signature memberships in Oil Painters of America (OPA) and American Impressionist Society
(AIS), and has earned the distinctions of Master Pastelist in the Pastel Society of America (PSA) and
Eminent Pastelist in the International Association of Pastel Societies (IAPS).
Born and raised in New Jersey, Barbara also lived in Atlanta, Georgia for many years until she yearned
for snow and mountains for her landscape subject matter, which prompted her family’s move to Bend,
Oregon in 2015.
PASTEL SUPPLIES
Pastels
Soft Pastels - Feel free to use your favorite soft pastels if you already have a good range of values, plus some
hard pastels mentioned below. I highly recommend organizing your pastels by value. If you plan to stock up a
bit before the workshop, here are some of my favorite soft pastels that I’ll use in my demonstrations:
* Terry Ludwig
* Schmincke
* Sennelier
* Jack Richeson (Handrolled Soft Pastels) – Their Winter Landscape 80 pc. set is one I developed for
workshop students, and is available through Dakota Pastels and Judson Art Outfitters. (At least one of
my demos will be a snow scene.)
Hard Pastels – NuPastel square/hard pastels have traditionally been my favorite for my initial block-in of a
pastel painting. However, they will soon no longer be available to order individually. Since they’ll be available
only in full sets, and I only use a few of these pastels, I’ve found alternative hard pastels that can be purchased
individually. The colors are basically a dark blue, bright orange, bright pink, violet and dark brown. Listed below
are the NuPastels, and then alternate options (in the same color order) in Cretacolor and Rembrandt. You’ll
need only the 5 pastels listed for one of these options (or a combination from any of the brands).
NuPastels: 244 Blue Violet, 212 Deep Orange, 306 Orchid Pink, 254 Violet Hyacinthe, and 353 Cordovan
Cretacolor: 239 Paynes Grey, 111 Orange, 133 Rose Madder, 139 Bluish Purple, and 219 Sepia Dark
Rembrandt: 548.3 Blue Violet, 236.5 Light Orange, 318.8 Carmine, 548.5 Blue Violet, and any dark brown hue*
(*I don’t have a Rembrandt equivalent chosen yet for the brown, but any dark, warm brown hue will work.)
Surface
We’ll use mounted UArt paper for the first two days; Sennelier LaCarte paper for the last day.
Mounted UArt – We’ll be using liquid underpaintings for the first two days, so the mounted version of the Uart
paper will be important. My favorite grit is 320 or 400, but any grit close to that will be fine for this workshop.
My recommended workshop size is 11x14.
Quantities/sizes: At least 2 11 x 14 boards (more if you’re a fast painter)
I recommend either of these options for pre-mounted UArt:
Mounted UArt paper from www.propartpanels.com.
or
UArt Premium Mounted Boards, available at www.dickblick.com or www.dakotapastels.com. (These are the
boards made by UArt, NOT UArt paper mounted by Dakota Pastels on conservation board, which have a
different texture.)
You can also mount regular UArt paper yourself to foamboard with a spray adhesive (prior to the workshop).
We’ll be using liquid underpaintings for the first two days, so the mounted version of the Uart paper will be
important.
Quantities/sizes: At least 2 11 x 14 panels (more if you’re a fast painter)
Sennelier La Carte pastel card – two 19.5 x 25.5 sheets cut in half (just for easier transporting). Any color is
fine but avoid anything darker than a mid-value; I use the “Sand” color for my demos. Or either of their smaller
size pads of this paper in assorted colors also works well. This paper will be for multiple small studies.
Other supplies:
* Small sketch book
* Artists tape
* A couple of sharp pencils (any type) for thumbnails, and sharpener; or a mechanical pencil
* ruler
* Pastel pencil, if desired, to draw in initial shapes for painting (I use Cretacolor Paynes Grey)
* Isopropyl alcohol for underpainting (just the cheap “rubbing” alcohol you find in the grocery store)
* Small jar for alcohol
* Brush for underpainting – Flat bristle brush…#6 or #8 (5/8” – 3/4” wide)
* Optional - backing board such as foamboard (a few inches larger on each side than your panel) to
hinge your painting panel, if working at a studio easel. This allows for plenty of space around the entire
panel.
* Hand wipes
* Paper towels
* Latex gloves or other hand protection if desired
* Portable easel if venue does not provide
Reference Photos (SAME FOR PASTEL OR OIL):
If you have your own landscape reference photos, please bring them. I'll provide copies of the photos I'll use
for my demos, which you may use if you’d like to work from the same photo. I’ll demo at least one snow scene.
You may work from printed photos or from photos on your laptop or iPad. (Please, however, do not plan to
work directly from photos on your phone.)
OIL PAINTING SUPPLIES
Paint* –
Titanium-Zinc (or Titanium) White (Gamblin)
Cadmium Lemon (Gamblin)
Cadmium Yellow Deep (Gamblin)
Cadmium Orange (Gamblin)
Yellow Ochre (Gamblin)
Permanent Red Medium (Rembrandt)
Alizarin Crimson (or Permanent) (Gamblin)
Transparent Red Oxide (Gamblin 1980 line; or Rembrandt)
Ultramarine Blue (Gamblin)
Cobalt Blue (Gamblin)
Viridian Green (Gamblin)
Sap Green (Gamblin)
Burnt Umber (Gamblin)…optional; only for toning, see below
*Listed above are my brand preferences and what I’ll likely use in my demos. I understand the expense of each
new tube of paint, so feel free to use similar alternatives you may already have. I tend to see the most
discrepancy in color mixing with yellow ochre and alizarin, so I do recommend using one of the brands I’ve
listed for those.
I tone my surface with a mixture of Burnt Umber and Alizarin, diluted with Gamsol. Once brushed on and
wiped with a rag or paper towel, it should appear as a warm flesh color, toned to about a 2 on a value scale of
1/lightest-10/darkest. (You can also use Transp. Earth Red + Alizarin for toning if you don’t already have Burnt
Umber and don’t want to buy it.) It’s ideal to tone your panels prior to the workshop, but you can also do it
there.
Surface – I recommend panels from www.canvaspanels.com (SourceTek – I like #13 oil primed linen on
Gatorboard, but any version is fine) or www.judsonsart.com (Guerrilla Painter® Extra Fine Oil Primed Linen
Panels…these are a great affordable option for workshop studies)
Quantities/Sizes:
2 11x14s (more if you’re a fast painter)
2 12x16s – this can be something cheap, even canvas sheets. You’ll divide each panel into 4 sections
of 6”x 8.” (You can draw lines to separate each panel into quarters, or use tape.) Any size surface will
work, as long as you have enough to fit about eight 6x8 studies. Something larger than 6x8 on which
you can fit at least a couple studies at a time will work best. You don’t necessarily have to tone these
surfaces, but it may be helpful to have one of them toned.
Brushes – Bristle brushes in sizes 1, 2, 3, 4, 6, and 8 (or other similar size range). Filberts for sizes 1-3; flats for
sizes 4-8. Bristle brushes, rather than softer synthetic brushes, will be important. More information is available
on the workshop page of my website (https://barbarajaenicke.com/page/9904/workshops) about an optional
Richeson brush set I have available for students, or to simply take a look at the brushes I’ll be using in my
demos.
Other supplies:
* Small sketch book
* Artists tape
* A couple of sharp pencils (any type) for thumbnails, and sharpener; or mechanical pencil
* ruler
* Portable palette
* Odorless mineral spirits such as Gamsol
* Painting medium (I use Gamblin’s Solvent-free Gel or Galkyd Gel, but any medium is fine)
* Wet canvas/panel carrier
* Palette knife
* Paper towels
* Hand wipes
* Latex gloves or other hand protection if desired
* Portable easel if venue does not provide
Reference photos

